Vera currently is not directly compatible with POPP Water Leakage Sensor, in this case, you can manually add compatibility and have it display open and close status over your interface. This guide is an additional guide to the POPP Water Leakage user guide.
Follow the below steps to add compatibility to your Water Leakage Sensor . This will need to be done to all new Water Leakage Sensors added into your network.
1. Pair Water Leakage Sensor to your Vera gateway
2. Ensure 2 generic node loads up, it should be
[The name of the main device do you given by you, in my case, it is called "Water Leakage Sensor"]
[The Name of the second device is assigned by Vera. "Motion-Sensor" ]
3. Select the arrow on your named device ["Water Leakage Sensor" in my example]
4. Click on "Advanced"
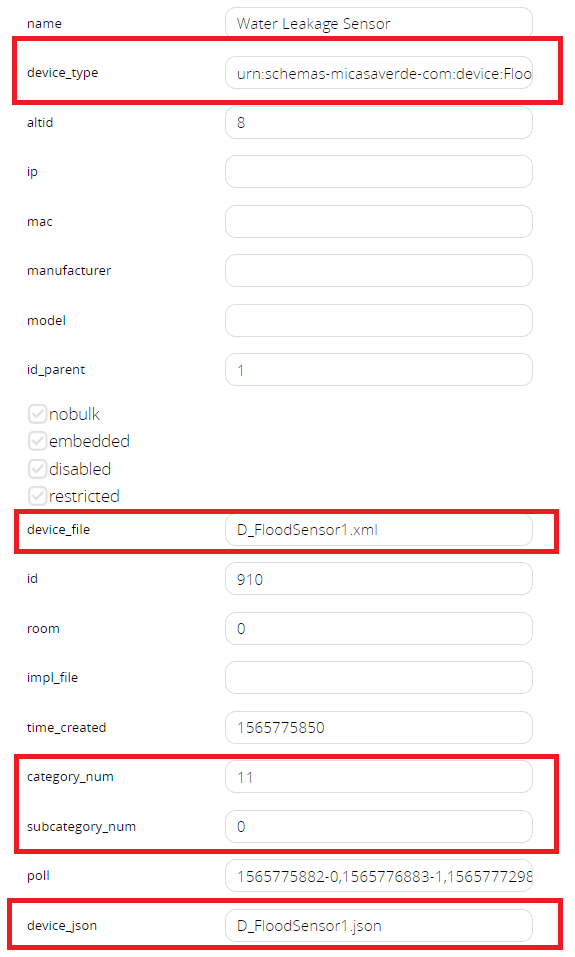
5. On the new page, make these changes:
Note: You can also do the same with the Second Device.
6. Go to Settings -> Z-Wave Settings, then "Advanced" tab.
